GitHub Actions & Angular 10/9: Install Node.js, Angular CLI and Deploy your App to GitHub Pages
In this example, we'll see how to use Github Actions to install Node.js and Angular CLI 10 and then build and deploy our Angular 10 application or any previous version to GitHub pages.
Throughout this tutorial, we'll learn how to set up Github Actions in your Angular 10 project to build and deploy your app to GitHub pages.
As a prerequisite, you need to have an Angular 10 project pushed to a GitHub repository.
Introducing GitHub Actions
Github Actions are a newly released CI/CD platform that can be used by open source repositories for free. It's introduced by GitHub to help developers automate their project workflow.
Github Actions can handle many processes that can be triggered by a multiple of events on the platform such as:
- push code
- make a release
- pull request
- create an issue, etc.
They can also be triggered manually from the Actions tab in your repository or by sending a secured (using a private access token) HTTP Post request to a predefined endpoint.
GitHub Actions help you automate all your development workflows from building, testing, to deploying your application to your host directly from GitHub.
If you have an Angular project pushed to GitHub, let's see how you can create a GitHub Actions workflow to build, test, and deploy the Angular application to GitHub Pages.
Step 1: Creating a GitHub Actions Workflow
According to the official docs:
A workflow is a configurable automated process made up of one or more jobs. You must create a YAML file to define your workflow configuration.
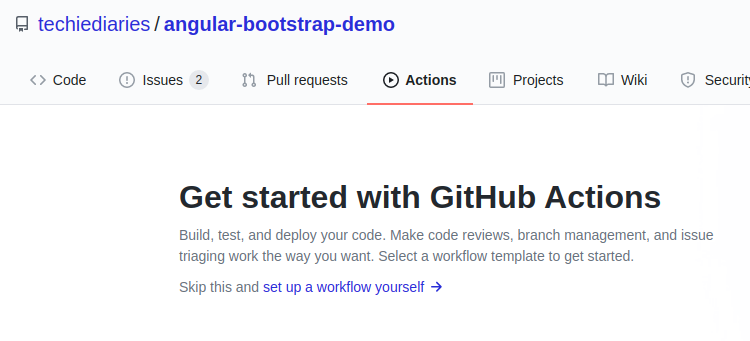
Head over to your GitHub repository, next go to the Actions tab and set up a workflow by clicking on the set up a workflow yourself link as below:
You can also create a folder named
.github/workflowsat the root of your Angular code repository with a workflow file that has the.ymlextension.
You'll be taken to the following UI:
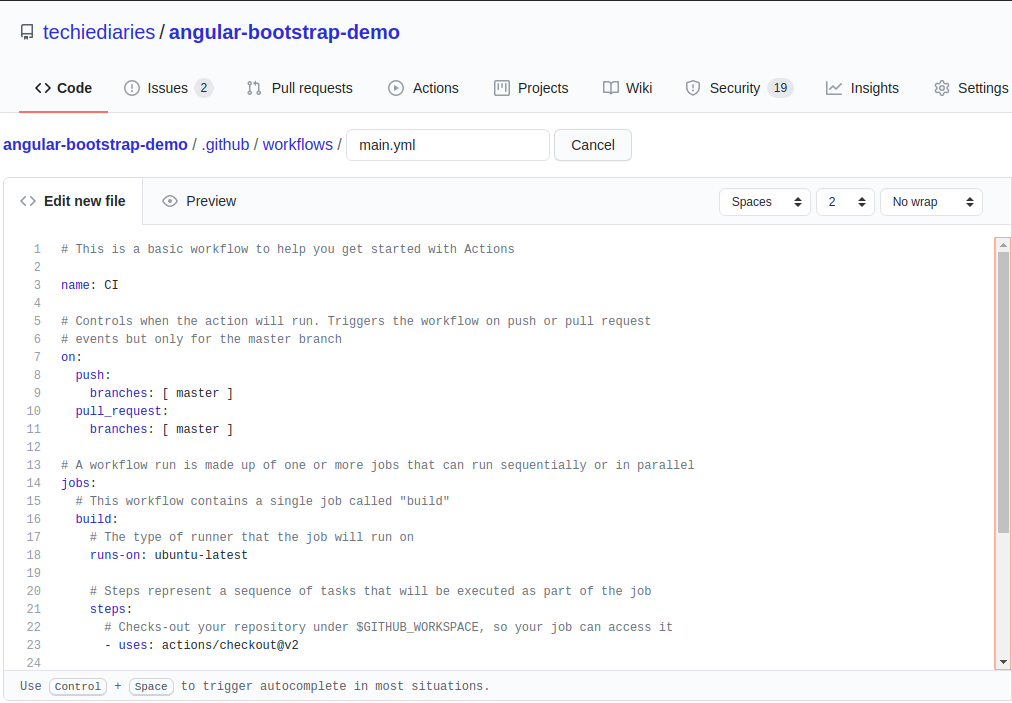
A workflow named main.yml will be created inside the .github/workflows folder of our repository with the following content:
# This is a basic workflow to help you get started with Actions

name: CI

# Controls when the action will run. Triggers the workflow on push or pull request
# events but only for the master branch
on:
  push:
    branches: [ master ]
  pull_request:
    branches: [ master ]

# A workflow run is made up of one or more jobs that can run sequentially or in parallel
jobs:
  # This workflow contains a single job called "build"
  build:
    # The type of runner that the job will run on
    runs-on: ubuntu-latest

    # Steps represent a sequence of tasks that will be executed as part of the job
    steps:
      # Checks-out your repository under $GITHUB_WORKSPACE, so your job can access it
      - uses: actions/checkout@v2

      # Runs a single command using the runners shell
      - name: Run a one-line script
        run: echo Hello, world!

      # Runs a set of commands using the runners shell
      - name: Run a multi-line script
        run: |
          echo Add other actions to build,
          echo test, and deploy your project.
The workflow is made up of a single job with two steps that simply print some messages on the shell of a Ubuntu runner.
A workflow run is made up of one or more jobs. Jobs run in parallel by default. To run jobs sequentially, you can define dependencies on other jobs using the
jobs.<job_id>.needskeyword. Each job runs in an environment specified byruns-on.
Step 2: Installing Node.JS and Angular CLI and Deploying to GitHub Pages
Let's modify the previous workflow to install Node.js and Angular CLI 10 and then build our project and deploy it to the web.
name: CI
on:
  push:
    branches: [ master ]
jobs:
  build:
    runs-on: ubuntu-latest

    steps:
    - uses: actions/checkout@v1
    - uses: actions/setup-node@v1 #this will install Node and npm on Ubuntu
      with:
        node-version: '12.x'
    - run: npm install
    - run: npm install -g @angular/cli > /dev/null
    - run: ng build --prod --output-path=dist --base-href="https://techiediaries.github.io/angular-bootstrap-demo/"
    - name: Publish generated content to GitHub Pages
      uses: tsunematsu21/[email protected]
      with:
          dir: dist
          branch: gh-pages
          token: ${{ secrets.ACCESS_TOKEN }}
We use the tsunematsu21/actions-publish-gh-pages to deploy our app to GitHub pages. This action will need an access token that needs to be generated from your GitHub account's settings page.
Checking out Source Code
Jobs do not get the code of the repository by default. We'll have to instruct the job to do it using the checkout@v1 action. We use the following step under our build job:
    steps:
    - uses: actions/checkout@v1
Installing Node.js
Angular CLI requires Node.js so we'll need to install it in our job running Ubuntu.
For installing Node.js. we'll add another step in our job as follows:
    steps:
    - uses: actions/setup-node@v1 #this will install Node and npm on Ubuntu
      with:
        node-version: '12.x'
Thanks to this, our build job is configured to use use Node.js version 12.x inside the Ubuntu runner.
Step 3: Generating a New Access Token
Go to https://github.com/settings/tokens/new and generate a new token with the repo scope and make sure to copy it.
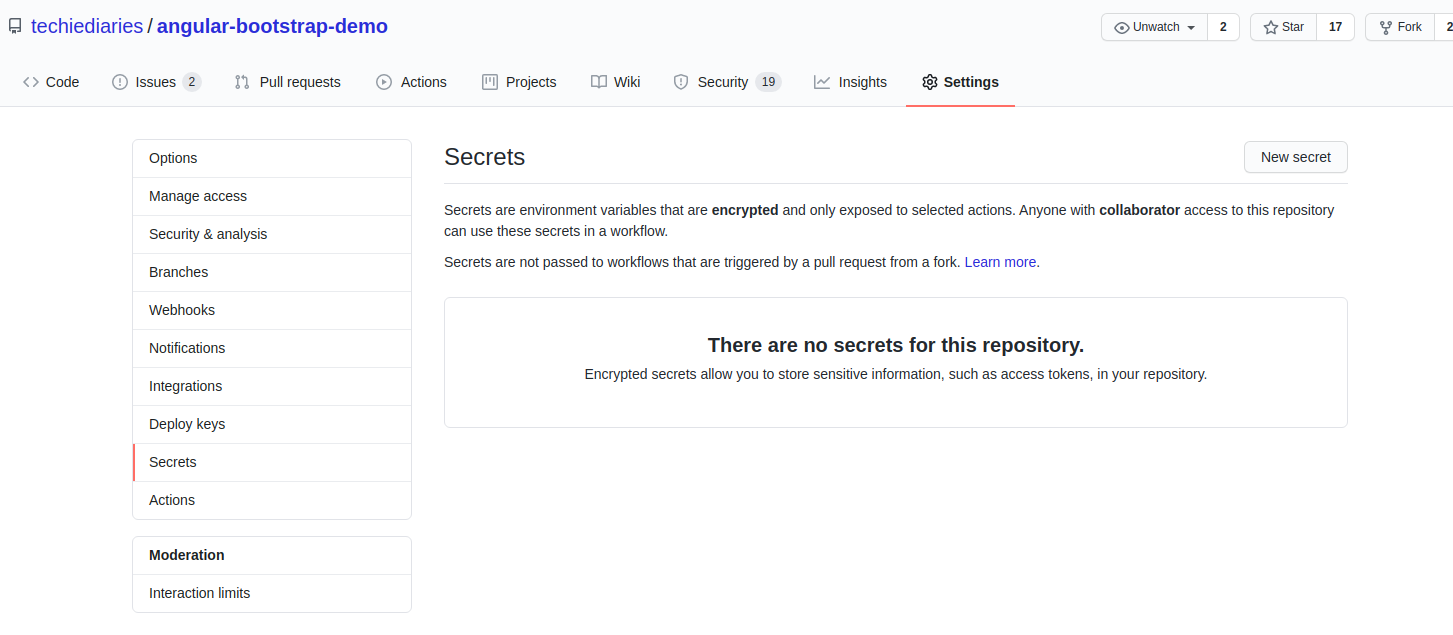
Step 4: Creating a New Secret for Access Token
Next, head over to your repository' Settings tab, and next go to Secrets and create a New secret:
 Name your secret
 ACCESS_TOKEN and paste your access token.
Step 5: Pushing and Starting your Workflow
Finally, commit your workflow file to your repo. The workflow will start automatically since it's configured to start when we push code to the repo.
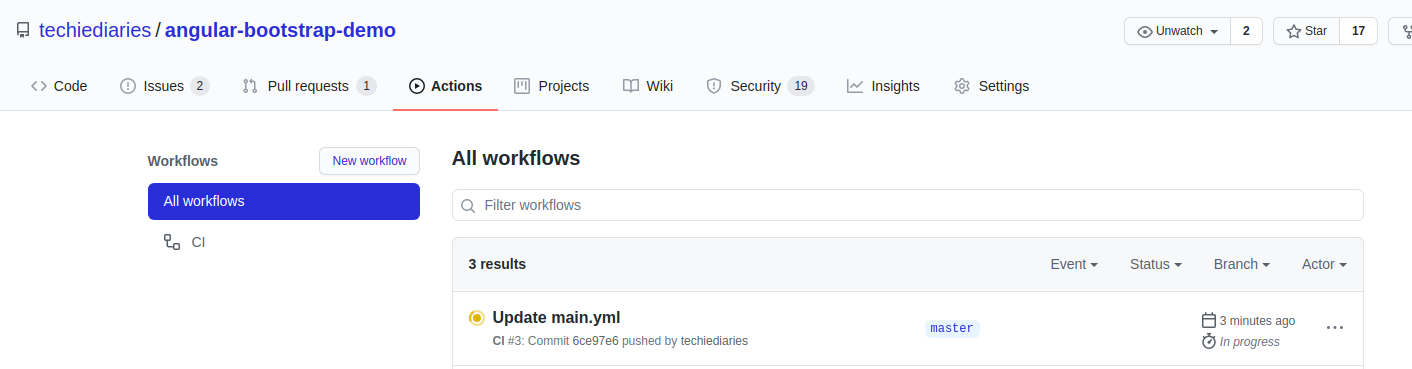
Go to the Actions tab to see the state of your build workflow:
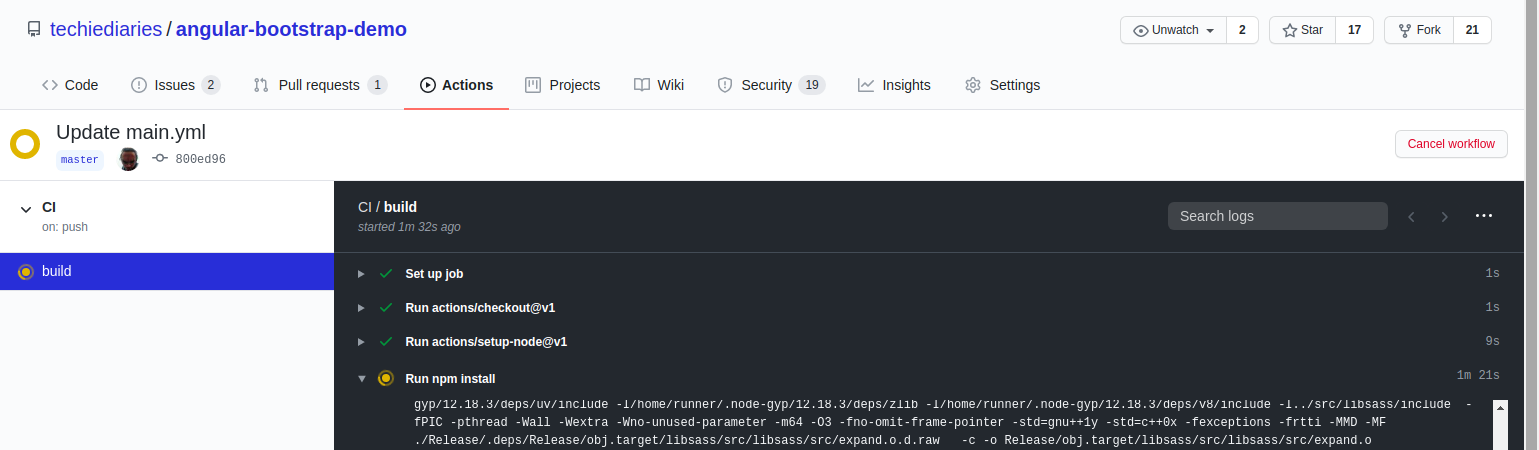
You can even visualize when the steps of the build job are running:
When completed successfully, you should have a gh-pages branch created in your repository that contains the content of the dist folder of our Angular application after being built with the previous build job.
See the app running from https://techiediaries.github.io/angular-bootstrap-demo.
Conclusion
We've successfully published our Angular application to GitHub Pages using GitHub Actions. We've seen how to install Node.js, Angular CLI and build our Angular application for production inside a Ubuntu runner.
-
Date:

Think Python

Python for Data Analysis

Automate the Boring Stuff with Python

Small Python Projects

Learn More Python 3 the Hard Way

The Quick Python Book

Python Beyond the Basics

Clean Code in Python
Awesome Vibe Coding
A curated list of vibe coding assistants, IDEs, tools and references for learning how to efficently collaborate with AI to write code. Best practices of prompt enginnering for developers. AI-powered tools for coding and UX/UI design. Our focus is on tools that allow for generating code or designs using natural language prompts.
