Angular 9/8 JAMStack By Example


We can actually create fully-working Angular 9 static sites following the JAMStack modern approach.
What is JAMstack?
According to the official website:
JAMstack: noun \’jam-stak’\ Modern web development architecture based on client-side JavaScript, reusable APIs, and prebuilt Markup.
JAMstack stands for JavaScript, APIs, and Markup. The term is first used by Mathias Biilmann to describe a modern web development architecture based on JavaScript, APIs, and prebuilt Markup.
When you build a JAMstack app, you only serve HTML using a CDN instead of doing any server-side preprocessing. This results in faster loading times, and less security problems.
You maybe thinking how can we build real-world useful web apps using JAMstack and without a server since even a simple form submission needs a backend server?
But in fact, the web has known a big essor in SaaS products that allow you to do any kind of server functionality via a simple API without the need to build it yourself. For example:
- SaaS products like Snipcart, Foxy.io, Moltin and Shopify’s Buy Button can be used for ontegrating e-commerce services in your JAMstack app.
- SaaS products like FormKeep, Typeform, Formspree, and even Netlify can be used for processing form.
- SaaS products like Algolia, Google Custom Search, Fuse.js, Lunr.js and List.js can be used for integrating search functionality.
- Apps like Disqus and Staticman can be used for user-generated content like comments & reviews, etc.
Building a Web App with Angular 9/8
Now, let's build a JAMstack application with Angular 9, HTML and a third-party API. The app is simply a news app that can be served from a CDN like Netlify. It's made of only HTML, CSS and JavaScript.
Note: Angular makes use of TypeScript but this will be compiled to plain JavaScript in the development machine before hosted on a CDN.
Installing Angular CLI 9
The Angular CLI is the offical tool for initializing and working with Angular projects. It's based on Node.JS and can be installed from NPM. Open a new terminal and run the following command:
$ npm install -g @angular/cli
Creating an Angular 9 Project
Next, we can initialize an Angular 9 project using the following command:
$ ng new angular-jamstack-demo
You'll be asked by the CLI if you Would you like to add Angular routing? Type y for Yes and Which stylesheet format would you like to use? Choose the first option which is CSS.
Next, navigate to your project’s root folder and run the development server using the following commands:
$ cd angular-jamstack-demo
$ ng serve
You'll be able to visit your Angular 9 app by pointing your web browser to the http://localhost:4200/ address:

This is how your app looks but this is just placeholder content that you need to replace with your actual content.
Let's open the src/app/app.component.html template that is associated with the root component and remove all the placeholder markup and leave only the router outlet directive for now:
<router-outlet></router-outlet>
If you are not familiar with the standard HTML element tags, you would think that this is part of HTML but it's actually an Angular directive from the router library that tells the client-side router where to insert the component matching the currently-visited path.
Creating and Adding Components to the Router Configuration
Angular components and directives allow you to reuse and extend HTML templates. In our example application, we can have the following components:
- Header, navbar and footer shell components,
- Home and about page components.
The home and about page components are mapped to specific routes, so they only appear when we we navigate the appropriate route.
While, the header, navbar and footer components belong to the shell of the application which resides in the src/app/app.component.html template.
Open a new terminal and run the following commands to generate the components and their HTML templates:
$ ng generate component home
$ ng generate component about
$ ng generate component header
$ ng generate component navbar
$ ng generate component footer
We'll have many folders with the TypeScript, CSS files, and HTML templates for each component.
You can see that Angular provides a powerful structure for our application than if you are using plain JavaScript, CSS and HTML files.
Adding Angular Routing
Angular routing allows you to control which HTML templates are rendered when a specific route is visited in the browser which allows you to create fully-fledged apps with JavaScript and HTML completely in the client-side without resorting to server routing.
Let's add the home and about components to the router configuration. Open the src/app/app-routing.module.ts file and update as follows:
import { NgModule } from '@angular/core';
import { Routes, RouterModule } from '@angular/router';
import { HomeComponent } from './home/home.component';
import { AboutComponent } from './about/about.component';


const routes: Routes = [
  { path: '', redirectTo: 'home', pathMatch: 'full'},
  { path: 'home', component: HomeComponent },
  { path: 'about', component: AboutComponent },
];

@NgModule({
  imports: [RouterModule.forRoot(routes)],
  exports: [RouterModule]
})
export class AppRoutingModule { }
Next, let's add the header, navbar and footer components to the app shell. Open the src/app/app.component.html file and update it as follows:
<app-header></app-header>
<app-navbar></app-navbar>
<router-outlet></router-outlet>
<app-footer></app-footer>
How do we know the tag names of each component. You can get and even change the selector used for a component from the associated TypeScript file of the component. For example, this is the header component:
import { Component, OnInit } from '@angular/core';

@Component({
  selector: 'app-header',
  templateUrl: './header.component.html',
  styleUrls: ['./header.component.css']
})
export class HeaderComponent implements OnInit {

  constructor() { }

  ngOnInit() {
  }

}
The selector property contains the app-header value which means we can include the component in HTML using <app-header /> or <app-header></app-header>.
If you save your changes, you should see the home page:
Now, let's add some HTML markup to our components. Open the src/app/home/home.components.html file and add the following HTML markup:
<h2>Home</h2>

<p>This is a JAMstack app built with Angular 9</p>
Next, open the src/app/about/about.component.html file and add the following HTML code:
<h2>About us</h2>
<p>This app is built by Techiediaries.</p>
Next, open the src/app/navbar/navbar.component.html file and add the following HTML code:
<a  [routerLink]="['/home']">HOME</a>
<a  [routerLink]="['/about']">ABOUT US</a>
We use the standard <a> tag in HTML and the routerLink directive in Angular to specify the navigation routes instead of the standard href attribute in HTML.
Next, open the src/app/header/header.component.html file and add the following markup;
<header>
    <h1>Angular 9 + HTML App</h1>
</header>
Next, open the src/app/footer/footer.component.html file and add the following markup;
<footer>
    <span>
        Copyright 2020
    </span>
</footer>
Note: You can see how we are able to use HTML fragments to create the UI of our application thanks to Angular routing and the powerful template syntax.
Now, how we do get and display data in our application?
Angular provides the HTTP client that we can use to fetch data from third-party APIs. Before we can use it, we only need to import its module and add it to the root module of our application. Open the src/app/app.module.ts file and update it as follows:
// [...]

import { HttpClientModule } from '@angular/common/http';

@NgModule({
  declarations: [
    // [...]
  ],
  imports: [
    BrowserModule,
    AppRoutingModule,
    HttpClientModule,
  ],
  providers: [],
  bootstrap: [AppComponent]
})
export class AppModule { }
Next, open the src/app/home/home.component.ts file and import then inject HttpClient as follows:
import { Component, OnInit } from '@angular/core';
import { HttpClient } from '@angular/common/http';

@Component({
  selector: 'app-home',
  templateUrl: './home.component.html',
  styleUrls: ['./home.component.css']
})
export class HomeComponent implements OnInit {

  private API_KEY = "YOUR_API_KEY_HERE";
  private API_ENDPOINT = `https://newsapi.org/v2/everything?q=comics&sortBy=publishedAt&apiKey=${this.API_KEY}`;
  data = [];


  constructor(private httpClient: HttpClient) { }

  ngOnInit() {

  }

}
Next, in the ngOnInit() method, call the get() method to fetch data from the remote API:
import { Component, OnInit } from '@angular/core';
import { HttpClient } from '@angular/common/http';

@Component({
  selector: 'app-home',
  templateUrl: './home.component.html',
  styleUrls: ['./home.component.css']
})
export class HomeComponent implements OnInit {

  private API_KEY = "YOUR_API_KEY_HERE";
  private API_ENDPOINT = `https://newsapi.org/v2/everything?q=comics&sortBy=publishedAt&apiKey=${this.API_KEY}`;
  data = [];

  constructor(private httpClient: HttpClient) { }

  ngOnInit() {
    this.httpClient.get(this.API_ENDPOINT).subscribe((data) =>{
      console.log(data['articles']);
      this.data = data['articles'];
    });
  }

}
Now, you should see your fetched data displayed in the console of your web browser but how do we display these data in the corresponding HTML template?
Angular Template Syntax: Interpolation, ngFor and ngIf
Here comes the magic of Angular template syntax and directives such as ngFor and ngIf.
Open the src/app/home/home.component.html file and update it as follows:
<div class="container">

  <div *ngIf = "data.length === 0">
    <p>
      Loading data...
    </p>

  </div>

    <div *ngFor="let article of data" class="card">
        <img src="{{ article.urlToImage }}">
                <div class="card-body">
                    <h3>{{ article.title }}</h3>
                    <p> {{ article.description }}</p>
                    <a href="{{article.url}}">Read story</a>
                </div>
            </div>

</div>
Using the ngIf directive, we conditionally render the Loading data... message while the data array is empty. When data is fetched and populatd in the data array, the message will disappear and ngFor will take care of iterating through and displaying each article of the data array.
We use interpolation to display the value associated with each article property.
Before we see the final result, let's add a bit of CSS styling to our HTML template. Open the src/app/home/home.component.css file and add the following CSS:
h1 {
    color: purple;
    font-family: 'kalam';
}

.container {
    display: grid;
    grid-template-columns: repeat(auto-fill, minmax(305px, 1fr));
    grid-gap: 15px;
}

.container > .card img {
    max-width: 100%;
}
Next, open the src/app/navbar/navbar.component.css and add the following CSS code :
:host {
    border: 0 solid #e1e1e1;
    border-bottom-width: 1px;
    height: 49px;
    padding: 0 16px;

    display: flex;
    flex-flow: row;
    align-items: center;
  }

  a {
    color: #c697d8;
    font-size: 19px;
    font-weight: 900;
    line-height: 49px;
    margin-right: 27px;
    text-decoration: none;
  }
}
Next, open the src/app/header/header.component.css file and add the following CSS code:
:host {
    color: rgb(25, 143, 221);

    border-top: 0px solid #9154f3;
    border-bottom-width: 1px;
    padding: 0 17px;
}
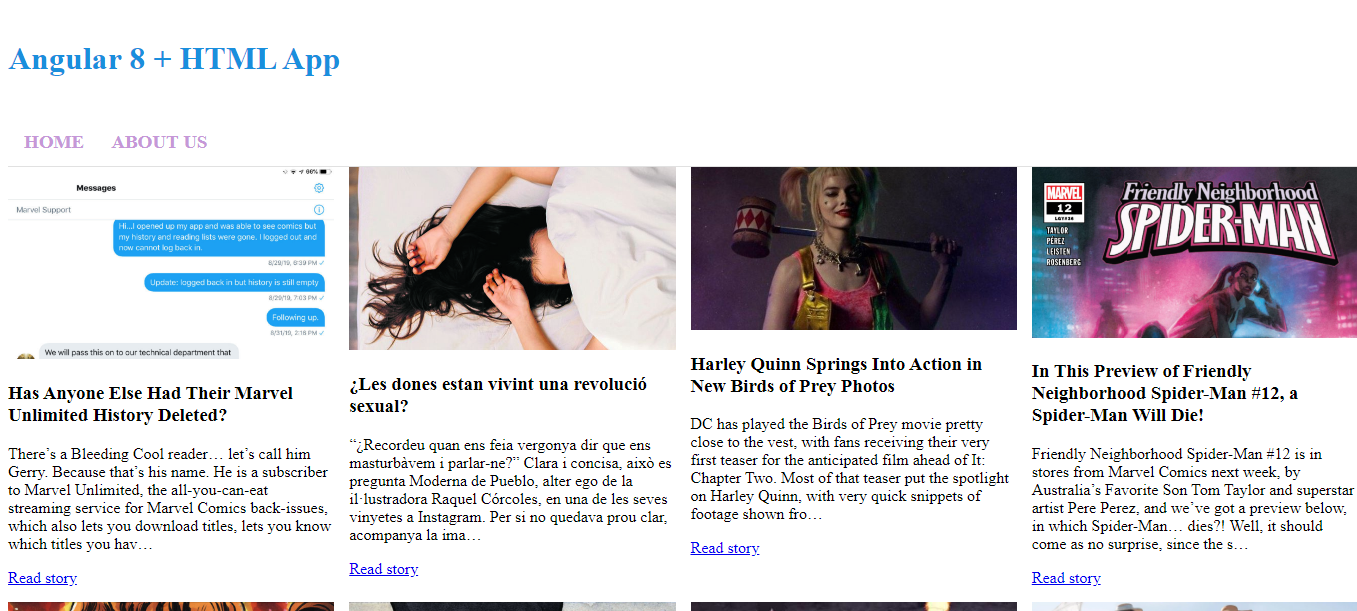
Now, this is our home page with the fetched data:
Check out the example in Stackblitz:
Conclusion
We've seen the concept of the modern JAMstack appoarch of building apps with Angular 9/8, HTML and CSS which can be served via a CDN and consume data via APIs.
- Author: Ahmed Bouchefra Follow @ahmedbouchefra
-
Date:
