Angular 18 Tutorial: Build your First Angular App

Welcome to an exciting journey into TypeScript Angular 18 application development! In this comprehensive tutorial, we'll walk you through the process of building a functional Angular 18 application from scratch.
Angular is a powerful front-end framework that empowers developers to create dynamic and interactive web applications with ease. Whether you're a seasoned developer looking to expand your skillset or a newcomer eager to dive into the world of Angular development, this tutorial is the perfect starting point.
Throughout this tutorial, we'll cover the fundamental concepts of Angular development, providing you with a solid foundation to build upon. From understanding the core concepts of components, and directives to mastering event and property binding, you'll gain invaluable insights into the inner workings of Angular.
To bring these concepts to life, we'll embark on an exciting project: building a basic calculator application. By leveraging the principles covered in this tutorial, you'll learn how to develop, and deploy a real-world Angular application that showcases your skills.
Whether you're aiming to enhance your proficiency in Angular development or looking to kickstart your journey as a front-end developer, this tutorial has something to offer for everyone. So, roll up your sleeves, fire up your favorite code editor, and let's embark on this exhilarating adventure into TypeScript Angular 18 application development!

Prerequisites of working with Angular 18
Before diving into building your TypeScript Angular 18 application, let's ensure we have all the necessary tools and prerequisites in place. Here's what you'll need:
Working Knowledge of TypeScript, HTML, and CSS: Familiarity with TypeScript, HTML, and CSS will be essential for understanding and developing Angular applications. TypeScript is the primary language used in Angular development, while HTML and CSS are used for structuring and styling your application's user interface.
Node.js and NPM Installed: Ensure that you have Node.js and npm (Node Package Manager) installed on your machine. Node.js is a JavaScript runtime environment that allows you to run JavaScript code outside of a web browser, while npm is the default package manager for Node.js. You can download and install Node.js from the official website: Node.js.
Angular CLI 18 Installed: Angular CLI (Command Line Interface) is a powerful tool that simplifies the process of creating, building, and managing Angular applications. Make sure you have Angular CLI 18 installed on your machine. You can install it globally using npm by running the following command in your terminal or command prompt:
npm install -g @angular/cli@18
Once you have these prerequisites in place, you'll be ready to kickstart your journey into building TypeScript Angular 18 applications. Let's dive in and start crafting your Angular masterpiece!
Generating our Angular 18 calculator project
Let's get started with creating a project once you've set up your environment by installing Node and Angular CLI on your machine. Open a terminal window and type the following command:
$ ng new ngcalculator
CSS is the stylesheets format that you should use.
Next, just wait for the CLI to create your project and download and install the necessary dependencies from npm before proceeding.
Afterwards, you can use the ng serve command to launch a live development server for your application:
$ cd ./ngcalculator
$ ng serve
Wait for the CLI to finish compiling your project and then start the server at http://localhost:4200.
Angular 18 components
Component-based design is at the heart of Angular's architecture. Although there are two structures here, they are not the same - Building your application as a set of modules using a modular design.
Each aspect of your feature should be implemented as a separate module, as a general rule. In a component-based design, your application is built from the ground up from individual components.
In an Angular 18 project generated using the CLI, the root component is conventionally named AppComponent. This component serves as the entry point of the application and encapsulates the top-level view structure. From there, the application hierarchy expands with nested components representing different sections or features.
Overall, component-based design in Angular promotes modularity, reusability, and maintainability by breaking down complex applications into smaller, more manageable pieces. By adhering to this architectural pattern, developers can efficiently develop, test, and maintain Angular applications of any scale.
In our calculator app, we don't need many components, but let's make one to encapsulate the calculator view and functionality. Open a new terminal, browse to the folder containing your project, and execute the following command:
$ ng generate component calculator --skipTests
Because we will not be adding any tests in this tutorial, we included the —skipTests option to inform the CLI to skip creating a file for component tests.
In the src/app/calculator folder, the CLI created the following files:
src/app/calculator/calculator.component.cssfor CSS styles.src/app/calculator/calculator.component.htmlfor the component's template or the view.src/app/calculator/calculator.component.tsfor the component logic.
Open the src/app/calculator/calculator.component.ts file:
import { Component, OnInit } from '@angular/core';

@Component({
  selector: 'app-calculator',
  templateUrl: './calculator.component.html',
  styleUrls: ['./calculator.component.css']
})
export class CalculatorComponent implements OnInit {

  constructor() { }

  ngOnInit() {
  }

}
The CalculatorComponent class knows about the template and CSS file thanks to the @Component() decorator which takes the following metadata:
selectorthat allows us to give the component a tag name that can be used to reference the component from other templates just like standard HTML tags.templateUrlthat points to the HTML template that renders the view of the component. You can also use an inline template with thetemplateproperty instead.styleUrlsthat allows us to associate one or multiple stylesheets to our component.
Since we didn't include routing in our application, we need a way to access our calculator component from our root component. That's where the selector property of the component comes handy - we can call our calculator component using the <app-calculator> tag. Open the src/app/app.component.html file, remove the existing content and add:
<app-calculator></app-calculator>
Creating our Calculator UI
We'll be using the HTML and CSS code from the following JS fiddle to create our calculator UI:
Open the src/app/calculator/calculator.component.html file and add the following code:
<div class="calculator">
<input type="text" class="calculator-screen" value="0" disabled />
<div class="calculator-keys">
<button type="button" class="operator" value="+">+</button>
<button type="button" class="operator" value="-">-</button>
<button type="button" class="operator" value="*">×</button>
<button type="button" class="operator" value="/">÷</button>
<button type="button" value="7">7</button>
<button type="button" value="8">8</button>
<button type="button" value="9">9</button>
<button type="button" value="4">4</button>
<button type="button" value="5">5</button>
<button type="button" value="6">6</button>
<button type="button" value="1">1</button>
<button type="button" value="2">2</button>
<button type="button" value="3">3</button>
<button type="button" value="0">0</button>
<button type="button" class="decimal" value=".">.</button>
<button type="button" class="all-clear" value="all-clear">AC</button>
<button type="button" class="equal-sign" value="=">=</button>
</div>
</div>
Next, open the src/app/calculator/calculator.component.css file and add the following CSS styles:
We also need to add some global styling so open the src/styles.css file and add:
html {
    font-size: 62.5%;
    box-sizing: border-box;
  }

*, *::before, *::after {
    margin: 0;
    padding: 0;
    box-sizing: inherit;
}
Now, go to your web browser and go to your app, you should see the following interface:
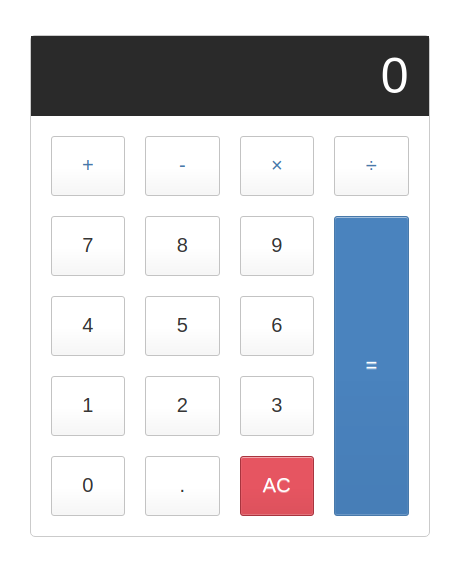
We must now utilize Angular magic to convert this template into a functional calculator.
Conclusion
In this first part, we created our Angular 18 calculator application. In the next tutorial, we'll use Angular data binding to make a working calculator.
-
Date:
Buy our ebook: Angular 17 from Scratch - Build an ecommerce app step by step!

Subscribe to our Angular Newsletter and Get 4 Angular eBooks for Free
- Ebook 1: Angular standalone components
- Ebook 2: Learn Angular In 15 Easy Steps
- Ebook 3: Practical Angular: Build 5 Apps From Scratch!
- Ebook 4: Build a Movies App with Angular 18 and Tailwind


