Angular 7|6 Tutorial Course: Authentication with Firebase (Email & Password)
This tutorial works with Angular 6.
This is our third tutorial of the Anguar 7 course to create a developer's portfolio website that showcases your projects that you will be able to enter from an admin interface that can be only accessed after you successfully login with your email and password.
In the previous tutorials, you have created an Angular 7 project with various components and pages. You will now add email and password authentication with Firebase.
Note: Since we only need to allow admin access to the portfolio owner we only need to provide login and logout functionality in our application without allowing registration. A user with email and password will be manually created in our Firebase console.
Adding Firebase Authentication
In this tutorial, we'll be adding the following functionalities:
- Email and password authentication with Firebase,
- Securing your Angular application with the Router Guards,
- Storing and accessing the authentication state using the browser's localStorage and Angular Observables
Creating the Angular 7 Project
We have previously created the developer's portfolio project in the previous tutorial. So, we are not going to repeat the steps in this tutorial. If you would like to follow the complete Angular 7 course then you simply need to start from that tutorial otherwise, you can also implement Firebase authentication in your existing project or create a new Angular 7 project using the ng new command.
Grab the previously created Angular 7 project from GitHub using the following command:
$ git clone https://github.com/techiediaries/angular-portfolio.git
Next, navigate inside the project's folder:
$ cd angular-portfolio
Install the project's dependencies using:
$ npm install
Finally, you can serve your web application to make sure it properly works:
$ ng serve --open
Setting up a Firebase Project
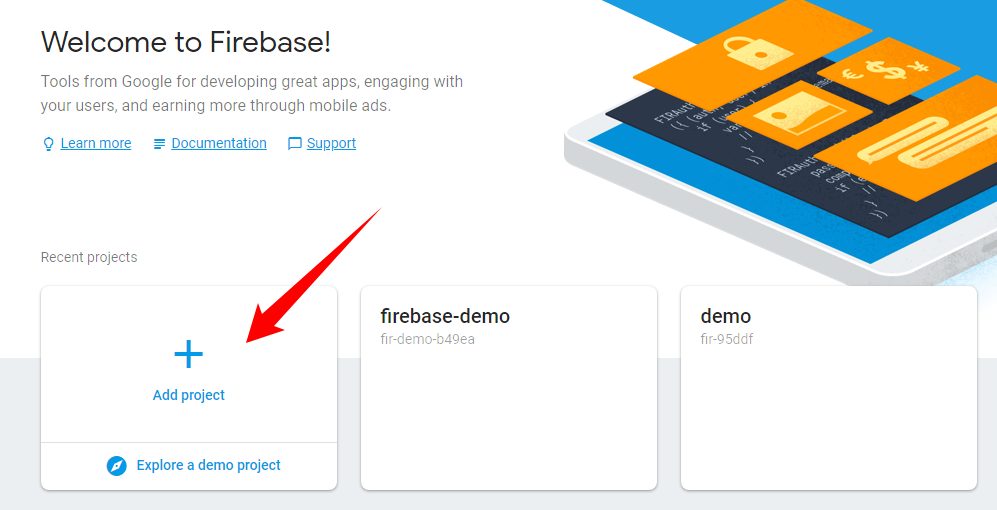
If you don't already have a Firebase setup, you simply need to head to your Firebase console and click on Add project then follow the steps to create a Firebase project.
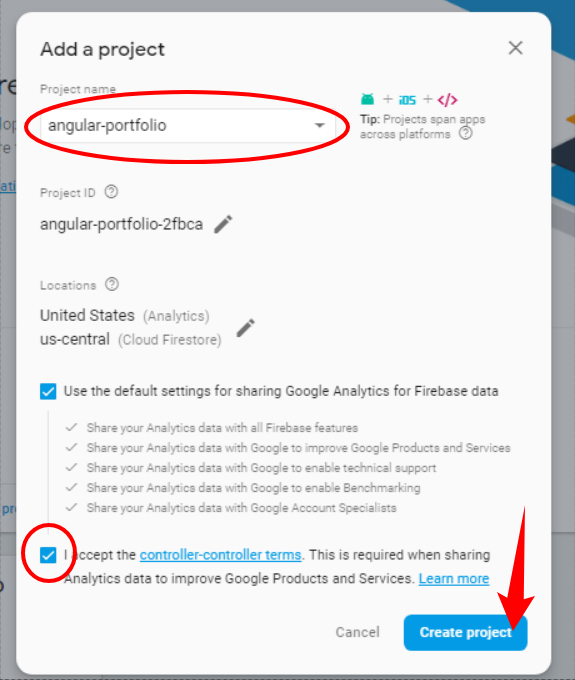
Enter a name for your project, accept the terms and click on the blue Create project button:
Once your project is created, you need to click on it to go to the admin dashboard for that particular project.
On the dashboard, go to Develop > Authentication and click on the Web setup button.

A popup window will be opened that contains your firebase credentials:
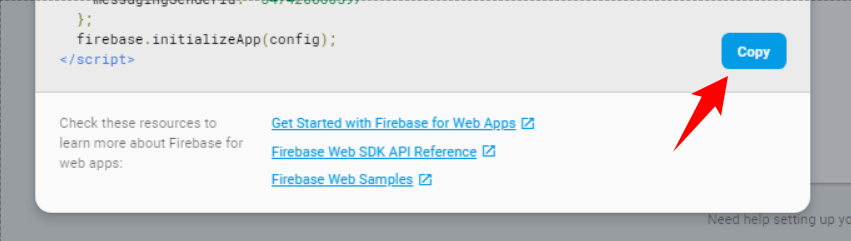
Click on the Copy button to copy all code with your credentials in your clipboard:
<script src="https://www.gstatic.com/firebasejs/5.7.1/firebase.js"></script>
<script>
  // Initialize Firebase
  var config = {
    apiKey: "YOUR_API_KEY",
    authDomain: "YOUR_AUTH_DOMAIN",
    databaseURL: "YOUR_DATABASE_URL",
    projectId: "YOUR_PROJECT_ID",
    storageBucket: "YOUR_STORAGE_BUCKET",
    messagingSenderId: "YOUR_MESSAGING_SENDER_ID"
  };
  firebase.initializeApp(config);
</script>
In our case, we only need to values of the config object because we'll be installing Firebase SDK from npm.
Next, you'll need to enable Email authentication from the authentication > Sign-in method tab:
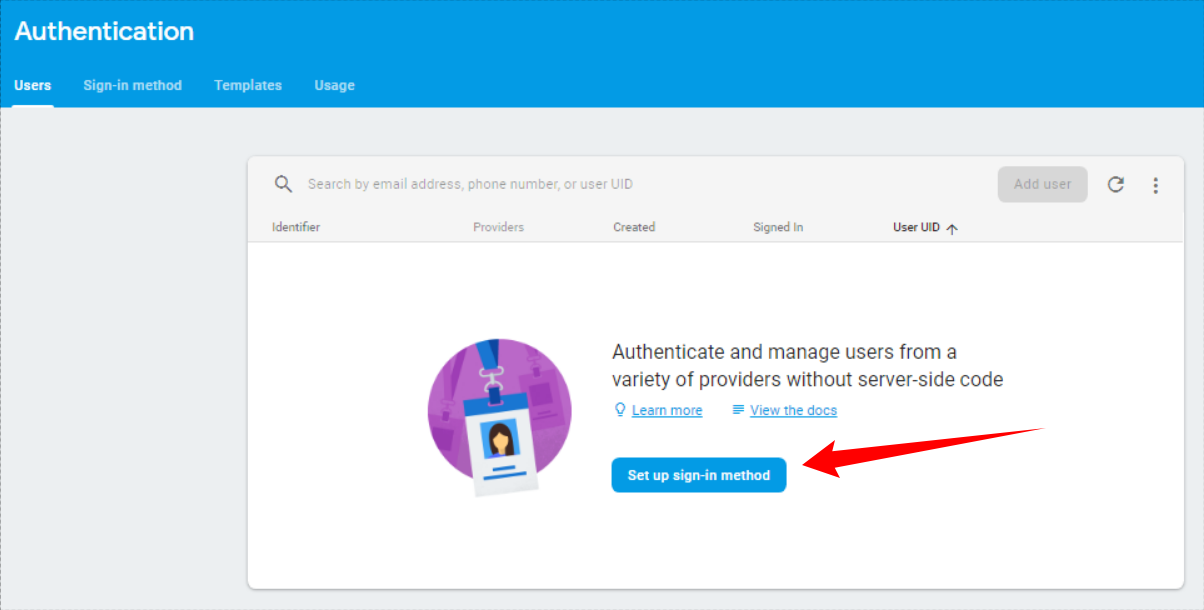
When you click on the Set up sign-in method button, you'll be takin to the following tab:
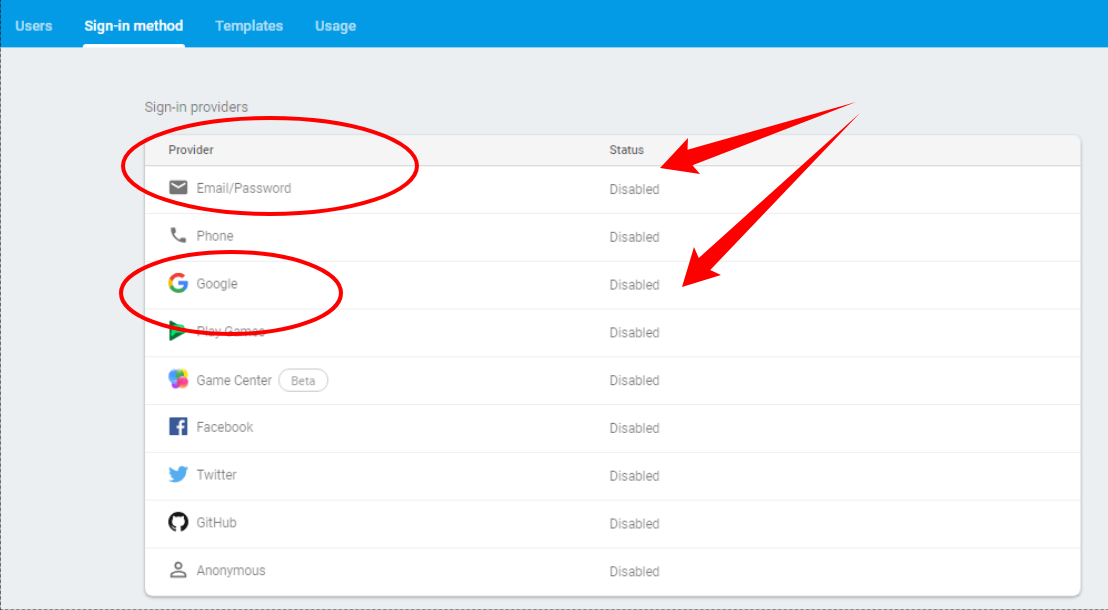
Click on the Email/Password row and then on Enable :
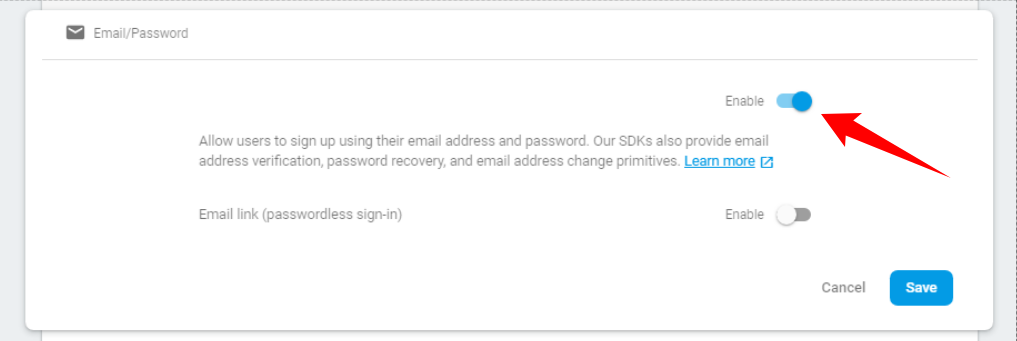
Finally click on the Save button.
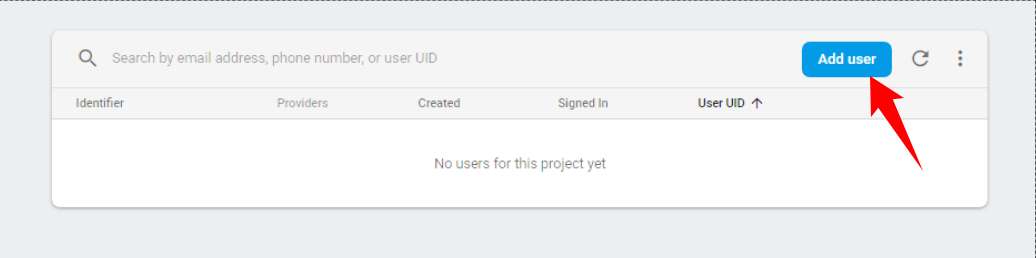
One last thing that you need to do from the console is creating a user with email and password that you'll use to login because we will not allow registration from our web application. Only the website admin will be able to access the admin interface to create their portfolio.
Go to the authentication > Users tab and click on the Add user button:
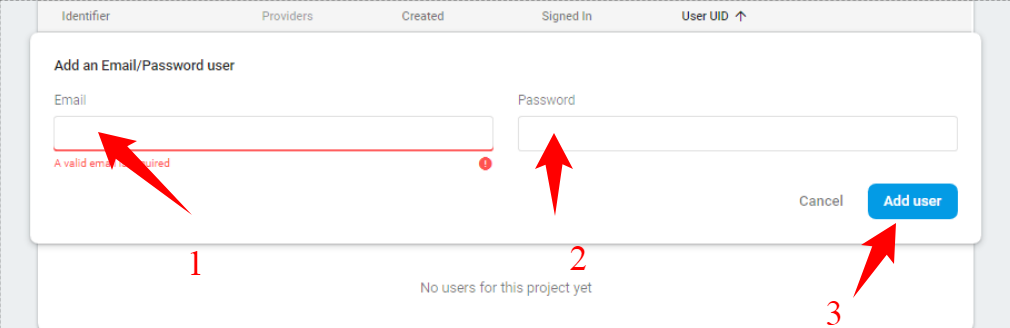
Enter your user's credentials and click on the Add user button:
Installing AngularFire2
Head back to your terminal, make sure your are inside your project's root folder and run the following command to install Firebase SDK and AngularFire2 from npm:
$ npm install firebase @angular/fire --save
As of this writing firebase v5.7.1 and angular/fire v5.1.1 will be installed.
Once the library is installed, you need to add it to your application main module. Open the src/app/app.module.tsfile and update it accordingly:
// [...]
import { AngularFireModule } from "@angular/fire";
import { AngularFireAuthModule } from "@angular/fire/auth";

var config = {
    apiKey: "YOUR_API_KEY",
    authDomain: "YOUR_AUTH_DOMAIN",
    databaseURL: "YOUR_DATABASE_URL",
    projectId: "YOUR_PROJECT_ID",
    storageBucket: "YOUR_STORAGE_BUCKET",
    messagingSenderId: "YOUR_MESSAGING_SENDER_ID"
};

@NgModule({
  imports: [
    AngularFireModule.initializeApp(config),
    AngularFireAuthModule
  ]
})
Creating the Authentication (Login) UI Component
After setting up Firebase authentication in our project using AngularFire2 v5, we'll now proceed to create a login UI.
Previously, we have created the admin module with a bunch of components to create, update and list the developer's portfolio projects. Now, let's create onemore components for user login. In your terminal, run this command:
$ ng g c admin/login
Open the src/app/admin/admin-routing.module.ts file and add the paths to the component to be able to navigate to it:
// [...]
import { LoginComponent } from  './login/login.component';

const  routes:  Routes  = [
{
path:  'admin',
component:  ProjectComponent,

children: [
    // [...]
    { path:  'login',component:  LoginComponent}
]
}
];
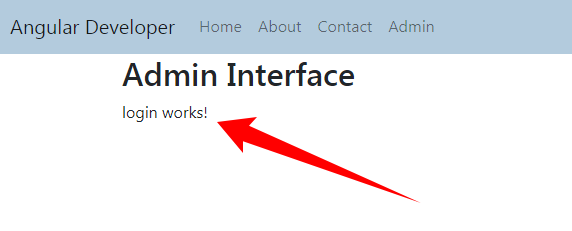
All these routes are children of the admin route. So, for example, you can access the login page from the http://127.0.0.1:4200/admin/login route:
Creating the Firebase Authentication Service
To abstract all the interactions with Firebase authentication, we will create an Angular service using this command:
$ ng g s auth/auth.service
Open the src/app/auth/auth.service.ts file:
import { Injectable } from  '@angular/core';

@Injectable({
    providedIn:  'root'
})
export  class  AuthService {
    constructor() { }
}
Start by adding the following imports:
import { Router } from  "@angular/router";
import { auth } from  'firebase/app';
import { AngularFireAuth } from  "@angular/fire/auth";
import { User } from  'firebase';
Next, add a variable to store user data:
export class AuthService {
  user: User;
Next, inject the Firebase authentication service and the router via the service's constructor:
@Injectable({
    providedIn:  'root'
})
export  class  AuthService {
    user:  User;
    constructor(public  afAuth:  AngularFireAuth, public  router:  Router) { }
}
Next, in the constructor, we subscribe to the authentication state; if the user is logged in, we add the user's data to the browser's local storage; otherwise we store a null user
    this.afAuth.authState.subscribe(user => {
      if (user) {
        this.user = user;
        localStorage.setItem('user', JSON.stringify(this.user));
      } else {
        localStorage.setItem('user', null);
      }
    })
Next, add the login() method that will be used to login users with email and password:
async  login(email:  string, password:  string) {

try {
    await  this.afAuth.auth.signInWithEmailAndPassword(email, password)
    this.router.navigate(['admin/list']);
} catch (e) {
    alert("Error!"  +  e.message);
}
}
Next, add the logout() method:
async logout(){
    await this.afAuth.auth.signOut();
    localStorage.removeItem('user');
    this.router.navigate(['admin/login']);
}
Next, add the isLoggedIn() property to check if the user is logged in:
get isLoggedIn(): boolean {
    const  user  =  JSON.parse(localStorage.getItem('user'));
    return  user  !==  null;
}
We are done with the authentication service. Next, we need to create the login and register UIs.
Implementing the Login UI
Open the src/app/admin/login/login.component.ts file and import then inject the authentication service:
import { Component, OnInit } from  '@angular/core';
import { AuthService } from  '../auth/auth.service';

@Component({
selector:  'app-login',
templateUrl:  './login.component.html',
styleUrls: ['./login.component.css']
})
export  class  LoginComponent  implements  OnInit {
    constructor(private  authService:  AuthService) { }
    ngOnInit() {}
}
Next open the the src/app/admin/login/login.component.html file and add the following HTML code:
<div class="container pt-3">
  <div class="row justify-content-sm-center">
    <div class="col-sm-10 col-md-6">
      <div class="card border-info">
        <div class="card-header">Login</div>
        <div class="card-body">
          <div class="row">
            <div class="col-md-4 text-center">
              <img src="https://placeimg.com/128/128/nature">
            </div>
            <div class="col-md-8">

                <input type="text" class="form-control mb-2" placeholder="Email" #userEmail required autofocus>
                <input type="password" class="form-control mb-2" placeholder="Password" #userPassword required>
                <button class="btn btn-lg btn-primary btn-block mb-1">Login</button>

            </div>
          </div>
        </div>
      </div>
    </div>
  </div>
</div>
Let's also add some styling for adding a shadow to the form in the src/app/admin/login/login.component.css file:
.card {
    box-shadow: 0  10px  20px  rgba(0,0,0,0.19), 0  6px  6px  rgba(0,0,0,0.23);
}
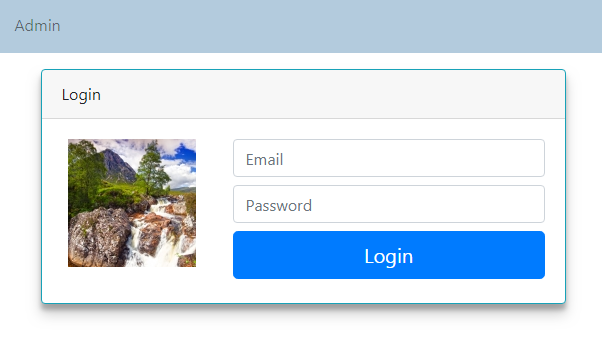
If you visit the http://localhost:4200/admin/login address, you'll see the following UI:
Next, you need to bind the form inputs and button:
<button class="btn btn-lg btn-primary btn-block mb-1" (click)="authService.login(userEmail.value, userPassword.value)">Login</button>
Adding the Logout Button
Open the src/app/header/header.component.ts file and inject AuthService:
import { Component, OnInit } from  '@angular/core';
import { AuthService } from  '../admin/auth/auth.service';

@Component({
selector:  'app-header',
templateUrl:  './header.component.html',
styleUrls: ['./header.component.css']
})
export  class  HeaderComponent  implements  OnInit {
    constructor(private  authService:  AuthService) { }
    ngOnInit() {}
}
Open the src/app/header/header.component.htmlfile and add a logout out button:
<li  *ngIf="authService.isLoggedIn" class="nav-item">
    <a class="nav-link"  (click)="authService.logout()">Logout</a>
</li>
Check out all parts:
- Angular 7|6 Tutorial Course: CLI, Components, Routing & Bootstrap 4,
- Angular 7|6 Tutorial Course: Angular NgModules (Feature and Root Modules),
- Angular 7|6 Tutorial Course: Nested Router-Outlet, Child Routes & forChild(),
- Angular 7|6 Tutorial Course: Authentication with Firebase (Email & Password),
- Angular 7|6 Tutorial Course: Securing the UI with Router Guards and UrlTree Parsed Routes
Conclusion
In the next tutorial, you'll use Angular 7 guards to protect the admin interface from unauthorized access i.e you will only be able to activate the route if you have successfully logged in with your email and password you provided when you created a user in the Firebase console.


