Building Modern Applications with Django, Vue.js and Auth0: Part 2
In this tutorial you will learn
- What is Webpack and why you should use it?
- The Webpack template used by the Vue CLI to generate Vue applications based on Webpack
- how to integrate Vue with Django so you can serve the front end application using Django instead of having complete separate front end and back end apps
- how to fix Hot Code Reloading when using Django to serve the Vue application
- how to update the Callback URL for Auth0 authentication
Introduction to Webpack
In this section we you briefly get introduced to Webpack (and why you should use Webpack?)
Essentially webpack is a static module bundler for modern JavaScript applications which becomes a fundamental tool with the rise of modern JavaScript front end frameworks such as Angular, React and Vue. It also can be easily configured to bundle other assets such as HTML, CSS and images via loaders. It will help you reduce the number of requests and round trips to your web servers, use modern standards such as ES6 and allows you to use npm modules in your front-end apps.
Webpack basically works by processing your application then builds a dependency tree which contains all modules used by the application and finally bundles all those modules into one or multiple bundles (depending on your configuration)
Webpack offers a plethora of features to bundle static assets (JavaScript, CSS, images etc.) for front-end web developers such as:
- the splitting of dependencies into chunks
- the support of a plethora of plugins
- it's highly configurable
- it's heavily customizable
- it's very flexible thanks to loaders
- you can interface with Webpack either from its CLI or API.
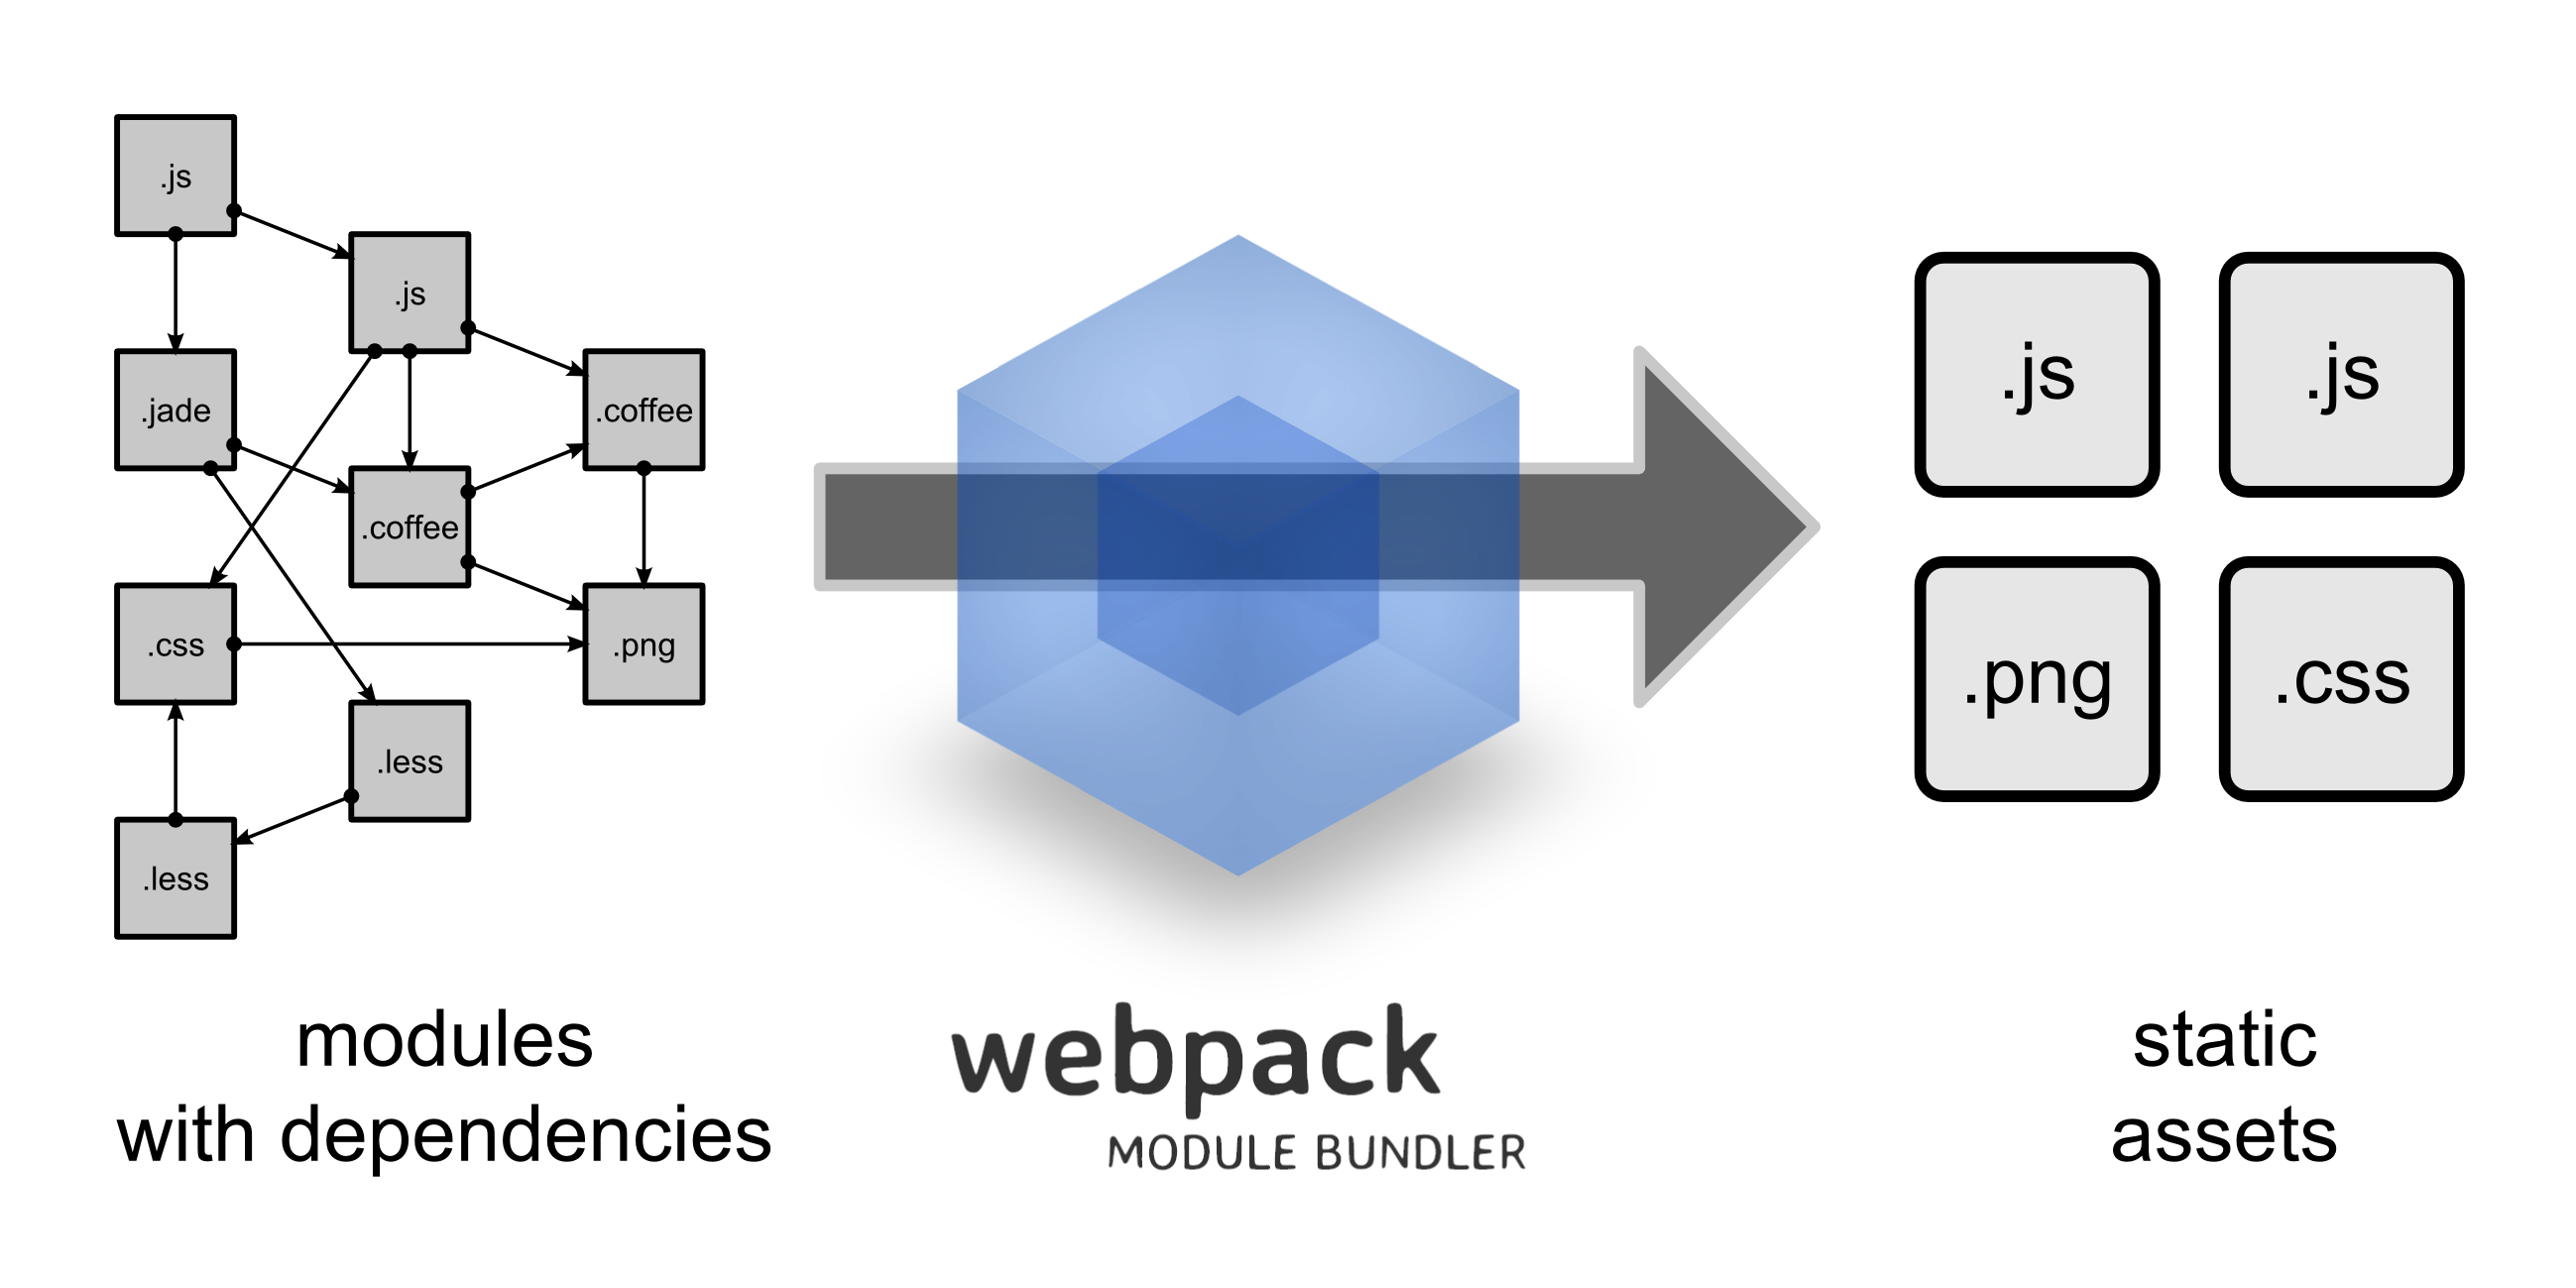
Webpack has four core concepts entry, output, loaders and plugins
The entry property allows you to define the entry point(s) for your Webpack configuration. It can either be a single string value, an array of values or an object.
The output property allows you to define the information Webpack needs to write the bundled file(s) to the drive such as the filename and the path (minimum two properties)
Loaders are powerful feature of Webpack as they are used to teach Webpack how to transform assets from other languages than JavaScript such as TypeScript, CSS, Sass etc.
Plugins are used to extend Webpack of anything beyond what can be achieved using loaders.
Webpack is a powerful tool that, once mastered, can help you to improve your front-end development workflow.
Vue Webpack Configuration
In this section we will briefly talk about the Webpack configuration for Vue
Vue uses its own file format with the extension .vue for encapsulating the HTML,CSS and JavaScript code (using <template>, <style>, and <script> tags respectively) to construct components. You can also add your custom blocks.
Vue supports the custom file format by using its own loader. vue-loader parses the .vue files, extract blocks inside the top-level tags (<template>, <style>, and <script> and possibly custom tags) then convert them to CommonJS modules.
You can also use languages that need pre-processing such as Sass or template languages that compile to HTML such as Jade by simply adding the lang attribue to a language block (for example <style lang="sass"></style>)
The Webpack boilerplate (that you have used to scaffold the Vue project using the Vue CLI vue init webpack vueapp) can be used for large projects. It's based on vue-loader and assumes you are familiar with Webpack.
This is the structure of your Vue application based on Webpack

There are many folders and files in the project such as:
package.json: this is the npm file that holds meta information about the package (such as the name, description, author and license etc.). This file also holds the name and version of every dependency that the package/project uses and custom build commands.
index.html: this is the main HTML file for the Vue single page application. This file is generated in the dist folder both in development and production builds and links to all generated assets will be injected in this file (you can use it to run your Vue application but since you are going to build your own template for Django that will dynamically injects the static assets using Django Webpack loader you don't actually need this file)
src: this one is obviously the source folder of your Vue application. Most development will take place inside this folder because it's where the actual application code lives.
build: this folder contains the Webpack configuration files for development and production i.e webpack.dev.conf.js and webpack.prod.conf.js. This is where you are going to work in order to fix Hot Code Reloading and also to instruct Webpack to generate webpack-stats.json file using a plugin.
build/config: this is the configuration folder that holds configuration settings for development and production. You are not going to touch this folder in this part but you'll be using it in the next part to set some variables required for production such as assetsPublicPath
static: this the static folder, don't be confused by its name! It's only used to put static assets that don't need to be processed by Webpack. The files in this folder will be copied as-is where the other assets are generated.
The Application Demo
In the previous part you have started building the Django and Vue demo. You have generated both the front-end application with the Vue CLI and the Django project. You also added JWT authentication via Auth0 then setup the front-end to connect to the back-end and made a basic call that's secured with Auth0.
In this second part you will continue building the demo application by integrating both the front-end application and the back-end application. Basically you want to make Django serve the Vue application so you'll need to make Django able to know about the static assets Webpack generates and also update Webpack configuration to fix HCR (Hot Code Reloading) of the Webpack Dev Server.
Integrating Vue and Django
In this section I'll show you step by step how to integrate Vue and Django
First head over to your terminal or command prompt then you'll need to clone the project we have previously built
git clone https://github.com/techiediaries/djangovue
You can also skip this step and just continue with the project you have built yourself in the previous part.
Please note that you need to have your previously created virtual environment activated before you install Django packages.
You can activate a virtual environment by issuing the following command
source env/bin/activate
Where env is the name of the virtual environment.
I assume that you have previously followed the steps in the part 1 to install the Django packages. if this is not the case use requirements.txt to install the requirements
cd djangovue
pip install -r requirements.txt
You also need to install the Vue app dependencies, navigate inside the frontend folder and execute:
npm install
Next run the following command to install the Webpack loader package for integrating Webpack with Django
pip install django-webpack-loader
Then go to your project settings.py file and add webpack_loader to INSTALLED_APPS :
INSTALLED_APPS = [
    #...
    'webpack_loader',
    'catalog',
    #...
]
Next you need to add the following object to settings.py to configure the Webpack loader
WEBPACK_LOADER = {
    'DEFAULT': {
        'BUNDLE_DIR_NAME': '',
        'STATS_FILE': os.path.join(BASE_DIR, 'webpack-stats.json'),
    }
}
This tells Webpack loader to look for webpack-stats.json in the root folder of the project. This file holds information about the static assets that Webpack has generated (you will see next how to generate this file).
Serving the Index Template
Now you need to create and serve an index.html file, where you can mount the Vue application, using a Django view
First create the index.html template in catalog/templates/index.html then add the following content.
{ % load render_bundle from webpack_loader % }

<html lang="en">
<head>
    <meta charset="UTF-8">
    <title>Django - Auth0 - Vue</title>

</head>
<body>
<div id="app">
</div>
{ % render_bundle 'app' % }
</body>
</html>
The page contains a <div> with the id app where you can mount the Vue application.
The render_bundle tag (with app as an argument) is used to include the app bundle files.
After creating the template, you can next use TemplateView to serve it. Go to your project urls.py` file then add the following:
from django.contrib import admin
from django.urls import path
from django.views.generic import TemplateView
from django.conf.urls import url

from catalog import views

urlpatterns = [
    url(r'^api/public/', views.public),
    url(r'^api/private/', views.private),
    url(r'^$', TemplateView.as_view(template_name='index.html'), name='index'),
    path('admin/', admin.site.urls),
]
Now reload your Django application, you will get the Yellow page with an error with Django complaining about not finding the webpack-stats.json file needed by the Webpack loader.
Error reading /xxxx/xxxx/xxxx/django-auth0-vue-part-2/webpack-stats.json. Are you sure webpack has generated the file and the path is correct?
This is a screen shot of the error that you will get

To get rid of this error you need to generate the webpack-stats.json file using the Webpack plugin webpack-bundle-tracker so first install it from npm using (make sure you are inside the Vue application):
cd frontend
npm install webpack-bundle-tracker --save
In frontend/build/webpack.dev.conf.js import webpack-bundle-tracker and include BundleTracker in Webpack plugins
const BundleTracker = require('webpack-bundle-tracker')
/*...*/

  plugins: [
    /*...*/
    new BundleTracker({filename: '../webpack-stats.json'})
  ]
This tells webpack-bundle-tracker to generate the stats file in the root folder of your project.
If you re-run you Webpack dev server, you'll have the webpack-stats.json file generated in root of your project

If you visit you Django app now you'll get this error in the console
Loading failed for the
<script>with source “http://127.0.0.1:8000/app.js”.
You can fix this error by going to frontend/config/index.js next locate the assetsPublicPath setting and change its value from / to http://localhost:8080/
/*...*/
module.exports = {
  dev: {

    // Paths
    assetsSubDirectory: 'static',
    assetsPublicPath: 'http://localhost:8080/',
    proxyTable: {},
    /*...*/
Next rerun your frontend app using
npm run dev
You should now be able to see your main Vue page by navigating with your browser to http://localhost:8000

Fixing Hot Code Reloading
This is what the docs says about Hot Code Reload:
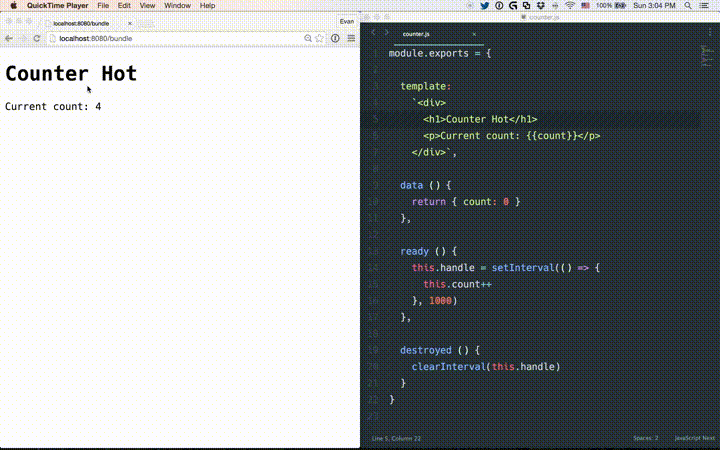
"Hot Reload" is not simply reloading the page when you edit a file. With hot reload enabled, when you edit a *.vue file, all instances of that component will be swapped in without reloading the page. It even preserves the current state of your app and these swapped components! This dramatically improves the development experience when you are tweaking the templates or styling of your components.
Now in frontend/build/webpack.dev.conf.js you need to configure the Webpack Dev server to accept requests from other origins such as http://localhost:8000 since the Django server will send XHR requests to http://localhost:8080 for getting the source file changes.
Add a headers object in devServer.
javascript
  devServer: {
    headers: {
      'Access-Control-Allow-Origin': '\*'
    },
  },
This will fix Hot Code Reloading when using Django server to serve Vue files. To test that, just change something in your Vue application and you'll be able to see your web page hot reloaded to see the changes without having to manually reload it.
That's all you need to do. Now re-run the Vue dev server then navigate with your browser to http://localhost:8000/. You'll be now able to interact with your application served from the Django dev server.
Updating Auth0 Callback URL
Previously you have used the Auth0 authentication from page served from the Vue server. So if you click the Login In button you'll will be redirected to this Callback URL mismatch page

Because now you are using the Django server to serve that page so you'll need to update (or add the Auth0 callback URL ) to http://localhost:8000/ to make the authentication works

You also need to set this address in your frontend/src/auth/AuthService.js file as redirectUri
  auth0 = new auth0.WebAuth({
    domain: '<YOUR_DOMAIN>',
    clientID: '<YOUR_CLIENT_ID>',
    redirectUri: 'http://localhost:8000/',
    audience: '<YOUR_AUDIENCE>,
    responseType: 'token id_token',
    scope: 'openid profile'
  });
Now you'll be able to authenticate using Auth0 to see this page and make a private API call

Conclusion
In this second part you have integrated your Vue application with Django so you can now use your web application by navigating with your browser to http://localhost:8000 the address of Django development server (Django is now serving the Vue application instead of just exposing API endpoints).
In development you still have to run and use the Vue/Webpack dev server so you have seen how to fix Hot Code Reloading so you can still have your web page hot reloaded even if you are using the Django server address.
In the next part you will further continue developing the demo application by creating Vue views and wire them using the Vue Router for the front end. For the back end you will see how to create API endpoints using Django REST framework and see how you can prepare this setup (Django and Vue) for production.


